Digital cameras, personal computers, good images, and the
 internet puts everyone in the publisher's chair of luxurious coffee table quality photo books. Unlike the bargain table photo books you pick up here and there to feed the hungry minds of children, do-it-yourself photobooks will be personalized to the reader and enjoy a more cherished spot on a young reader's shelves.
Services like iPhoto or Shutterfly are still in their infancy--no corinthian leather bound volumes yet--but the page layout tools let you find the right placement for as many images as you want. Using mouse and keyboard you can fill a page with a single image, drop two side by side, laydown a four-by, or toy with multiple other design choices.
Cost is a major drawback. You can calculate thirty bucks per book landed in your hands after you click the "buy" button. But because the results
 tend to be spectacular--a hardbound book, 8 3/4" x 11 1/4", printed on shiny heavy stock paper, "bled" to the edge--the value will exceed its cost.
Right now's the time to start planning your own Photobooks for the 2008 holiday season, or a notable occasion. I have a one year old granddaughter who loves books and birds. I've assigned myself two book projects: counting and alphabet books.
Here is a counting from 1 to 10 photo book I put together using one image, Photoshop, a Macintosh and iPhoto's publishing service. Photoshop is the sine qua non of image processing. Your digital camera probably came with a "lite" version of a photoprocessing software. Hopefully, it will be enough software to let you shrink and crop, rotate and flop, adjust contrast and color, and superimpose images atop one another.
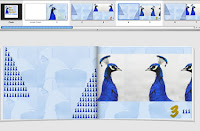
I planned the book to have a counting page on the right hand side, a "blank" or activity space on the left hand page.
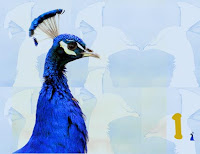
1. Make the background. I started with a good image of a peacock shot against a neutral background. Using Photoshop's Magic Wand tool, I select the neutral background, then Select Inverse and copy. This copies the silhouette of the peacock to the clipboard. I create a new 8.5 x 11" document and paste the clipboard. Colorize the image to a light blue derived from the peacock's hue. Copy this tattoo six times onto the page. Flatten the image and save as bg.
2. Make the icon. My page design calls for the numeral and that number of tiny peacocks in the lower right hand corner. The "nine" page has nine images of the same peacock, the number "9" and nine tiny peacocks. Going back to the original image, I crop it tightly and save as image. This will be the "how many do you count" image. To make the page counter, scale the cropped image to 1/2" high print size. Save as icon. Build a row of ten 1/2" high icons. Flatten and save as 10icons.
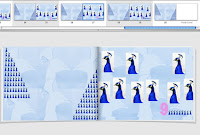
3. Build the page. As you build the counting pages use the ten icons and eraser tool to reduce the count. Lay them in the corner, type the new count number, flatten, save as that page number.
Decide how you want the headcount to appear and lay them in place. Flatten and save. You can see how I used some eccentric alignments. I think it'll be fun to read this book with the kid and talk about all the differents ways one can count to ten.

4. Build the "blank" page. I laid down a progression of icons from 1 to 10 and copied it twice onto the bg page. Since I couldn't figure out how to use the same image multiple times in my iPhoto purchase, I copied the "blank" page enough times to use a different file between each page to the last inside page.
5. Design a cover image. You can order a cover with a cut-away that frames the image on the first page. If you prefer, and the
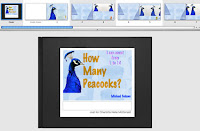 vendor offers the option, you can have a different image glued onto the hard cover, and have the vendor print additional text like the child's name. Lots of cover possibilities here. In fact, a relative requested one for her boys, so I'll reorder and have their name printed on the cover. Tan fancy, que no?
6. Design your book. Since I Photoshopped everything to be print size 8 1/2" x 11" images, I laid out the book with 1 image only per page. After completing the Photoshop work--several hours--I imported them to iPhoto, built an Album, opened the buy a book menu, and trust to firewalls and crossed fingers.
My current project is an A to Z book illustrated with birds of the same letter. A Albatross, B Blue Heron . . . . for "Z" maybe it'll have to be a zebra with a feathered friend. This week I'm off to the annual Winter Bird Festival at California's Morro Bay, tripod and rental long lens in hand. Hope I can find something good to read during those long, cold nights.
See you next week.
mvs
I keep a google alert for bird festivals, yours came up!
ReplyDeleteHave you told your daughter about the ivory-billed woodpecker. At ibwfound.blogspot.com we have a book for children that tells the story of the rediscovery. You may want to check it out. Best wishes for a New Year!
I just discovered this service as well! I was able to use some pictures I took in Puerto Rico and an article I wrote about some unusual dining experiences with my son and create a professional looking book. The software is easy to use, the results are gorgeous and it makes a great gift.
ReplyDelete